How to Play Guitar for Beginners
Watch the #1 Video on YouTube for Beginner Guitar Players
- Over 3.4 Million YouTube Views to this video alone!
- Over 95% of voters liked this great beginner video
- “Simple, Fun, Easy”
- Completely free lesson, start learning to play the right way
How To Play Guitar : Lessons For Beginners
The guitar is a musical instrument made primarily of wood and has steel or nylon strings that when plucked or strummed vibrate to create sound. There are several types of guitars. The main types of guitars are acoustic and electric. With acoustic guitars the sound is projected acoustically through the sound hole in the body. With electric guitars the sound is projected through electrical amplification. Guitars are used in many genres of music from rock and pop to blues and jazz to classical and flamenco. With some time and dedication to practice, you can learn how to play guitar and be well on your way to playing many of your favorite songs. There are literally thousands of songs that use some of the most basic guitar chords and techniques.
The Parts Of The Guitar
The first thing you need to learn about guitar is how to identify the parts.
The Body – The body of the guitar, electric or acoustic, is the biggest part of the guitar. It is made of wood and resonates to create the sound when the strings are plucked or strummed. The acoustic will have a sound hole in the body and an electric will have pick ups. There are many shapes and styles to both electric and acoustic guitars. Some common types are dreadnought for acoustics and stratocaster for electric.
The Bridge – The bridge is where the strings attach to the body. The bridge can be adjusted easily on electric to improve the action of the strings on the fretboard.
The Neck – The neck is the long, thinner piece of wood that contains metal markers called frets that divide the neck up into the individual notes. The neck has a flat side called the fretboard where the fingers are placed when playing notes. The other side is curved. Necks can vary in thickness and type of wood used.
The Headstock – The headstock sits on top of the neck and is where the strings attach on the other end of the guitar to tuning pegs that can be turned to tighten and loosen the strings when tuning the guitar.
Holding The Guitar
Before playing your first notes it is important to learn how to hold the guitar correctly. If you are right handed you will strum or pick the strings near the sound hole or pickups with your right hand and fret the notes on the fretboard with your left hand. This would be opposite for left handed players.
Position – As a beginner the easiest thing to do is sit in a chair with no arms or a stool. The thinnest string on the guitar should be closest to the floor. The curve in the body should rest over the thigh of your srtumming hand. The back of the body can rest against your chest or stomach.
Right Hand (or Strum Hand) – Your forearm should rest over the upper back portion of the body so your hand is placed somewhere between the sound hole and bridge. this position can vary and should be comfortable for the player.
Left Hand (or Fret Hand) – Your fret hand should cradle the neck. Your thumb should be on the back of the neck and fingers curl from under the neck to come down on the fretboard in a nearly 90 degree angle. Avoid resting your palm on the bottom of the neck. Remember that this is new and may feel uncomfortable for a while.
Tuning The Guitar
Tuning your guitar is the most crucial aspect of playing music. If instruments are not tuned properly music sounds very bad, no matter what you play. Even just one string slightly out of tune can cause every chord to sound bad, let alone an entire ensemble. You should tune your guitar before every practice session and even several times within a practice session.
String Names – The first part of learning how to tune your guitar requires you to know and memorize the notes of the 6 strings when played open. Open meaning without any fingers pressed down on the fretboard. The names or notes of the 6 open strings are from thinnest to thickest E (High E), B, G, D, A, and E (Low E).
Electric Tuner – The easiest way to tune accurately, especially for a beginner, is to buy an electric tuner. I would highly suggest buying a clip on tuner such as a Snark Tuner. These tuners work based off of the vibrations on the guitar so other noises in the room do not interfere. They are fairly inexpensive, costing around $20.
Tuning By Ear – Tuning by ear is a skill that should be learned, but this can take time. It can be done by having a reference note played by another tuned instrument such as a piano. For example the piano would play an E note and then you would tune your E string to match that pitch on the piano. Once you have one note tuned from the piano you can tune the rest of your guitar to the one string you have in tune. Once the E string (Low E) is in tune you can play the 5th fret E string and open A string together and tune the a string til it matches. Repeat these steps for the D, G, and high E strings. The process is a little different for the B string. you need to play thee 4th fret G string to tune the open B string.
Playing Notes
Once your guitar is tuned it is time to start practicing how to play notes. To play a note you press your finger down on the string between the frets (the metal strips that divide the fretboard). To play the 5th fret note you would need to press down in the space between the 4th and 5th fret. To get the cleanest tone, it is best to place your finger right behind the 5th fret but not right on top of it. Also, make sure you are pressing down with the tip of your fingers and not the pads. This will cause some soreness at first but will get easier the more you play. You should practice fretting notes all over the fretboard with all four fingers.
Picking The Strings
There are several ways to pluck or pick the strings. Most often players start by using a piece of tear shaped plastic called a pick. Other ways include using your fingers (fingerstyle) or a combination of the two called hybrid picking. To hold a pick place it between the thumb and first finger of your strumming hand. Use the more pointed end of the pick to strike individual strings in a downward motion. It does not take a ton of effort and you want to avoid over shooting your target string. We can also use the pick later when playing chords to strike multiple strings.
Learning Basic Chords
Chords are used in music to provide the harmonic backbone. Chords are made up of 3 or more notes played together. There are 2 main types of chords used in music, major and minor chords. Playing chords is one of a guitar players primary roles in any music ensemble. By learning just a handful of chords you can play many popular songs.
Open Chords – Open chords are the easiest chords to play and the most commonly used. They are called open chords because they use one or more open string in the shape of the chord. The easiest open chords to learn at first are Em and G followed by D, C, and Am. You can learn these chords by referencing chord diagrams that show you where to place your fingers and specifically what fingers to use. Here is an example of a chord diagram:
The X’s at the top of the diagram tell you not to play that string. The O’s tell you to play that string open. We have a full list of all the chord diagrams in our subscriptions and packages.
Barre Chords – Barre chords are another type of chord that uses the same finger position to create the same chord with a different root note. These chords are more difficult to play because it requires you to use the same finger to fret more than one string, often times all six strings. They are very useful in the fact that they are movable and you only have to memorize a couple different finger placements.
Perfecting and Practicing Chords – Once you have the finger placement down on some chords it is time to work on switching from one chord to another. This is, for a lot of beginners, one of the most frustrating parts of learning how to play guitar. There is no easy way to get it down. The best way is to just get a lot of repetition in your practice routine. With lots of practice, within a few weeks you will be able to switch these beginner chords seamlessly. If you are getting a buzzing sound that means you are not pressing down hard enough on the strings. It is important to make sure you are playing on the tips and arching your fingers. Be sure not to be muting or blocking some of the notes in the chord. The best way to do this is check your chord by playing each note of the chord individually to make sure they are all ringing out. One of the best ways to practice switching chords is to find a few easy songs that use the chords you know.
Strumming Chords – Strumming and rhythm are one of the hardest things to teach. Make sure at the beginning you are keeping your strumming patterns simple, just playing down strums on the beat. Strumming chords should come from mostly the wrist and a little the elbow. Keep your wrist loose and try not to tense up. You do not need to dig into the strings to hard to make a good sound.
Practice Routine
Why do I need a Practice Routine?
Developing a good practice routine is essential to learning how to play guitar and improving your guitar playing skills. Like any physical activity, it is a good idea to warm up with some exercises. I like to warm up by playing through scales. I usually start with the Major scale and play through all 12 keys. Then I move on to the Minor scale and play through all 12 keys. I will repeat this process with all the scales and modes I know. I might also throw in exercises of playing scales in thirds. Practicing the connection of relative scales is great finger work and increases your knowledge of the fret board for improvisational purposes, so it would be good to practice this daily as well. After scales, I might run through some arpeggios as well. Now that I am nice and warmed up I can focus on whatever particular technique or song I am working on. Currently, I am working on Travis Picking and Ragtime style finger picking. Once I am warmed up with exercises I play through several songs I have been learning in this genre.
Practicing the Right Way
Part of practicing is having the discipline to correct yourself when you mess something up. If you are having trouble playing something it is always good to slow it down. If you can’t play it slow, you will never be able to play it fast. Don’t just play through entire songs or pieces at once. Stop and work on the sections that give you the most trouble. Once you have mastered the troublesome part, then move on.
Watch Your Pace
When learning guitar online it is important not to rush yourself through the lessons. My advice would be to watch a lesson and then practice that lesson for 4 to 7 days. Do not move on to the next lesson until you have mastered the previous lesson. Playing guitar is like any other talent. It takes time, patience, and discipline.
Gain Unlimited Access to Hundreds of Lessons for only $25 a Year


OR
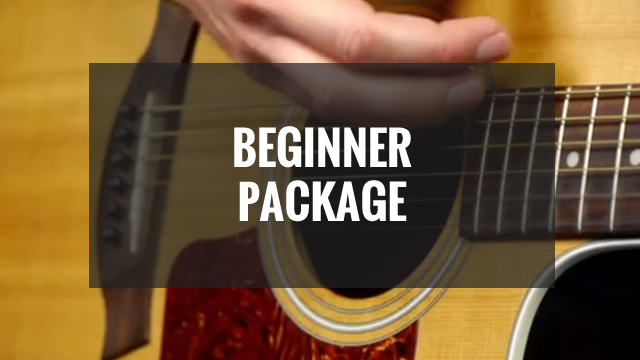
Start With Our Beginner Lesson Package. This Package Includes 60 Lessons!
Video Transcript
How to play guitar for beginners
We are going to talk about the proper way to hold the guitar. As you can see the guitar has an arch right here, this fits pretty perfectly over your thigh. It will sit pretty comfortably right over your thigh.
Proper Hand Technique
Now, your right hand, you want your forearm right here resting comfortably on the body of the guitar, in this area. You want the palm of your hand, this part right here, to rest lightly on the bridge. Not in front where you are muting the strings, but right behind. It gives your right hand a good pivot point, and more control. You definitely don’t want your right hand to be floating around, especially with the exercises we will be starting here.
Now your left hand, you want the pad of your thumb on the neck of the guitar, on the back of the neck. Don’t use the tip of your thumb, use the pad. And you want to wrap your hands around, so when you are pressing down on the fret, your fingers are arched. You always want to be playing with the tips of your fingers, not the pads. Your fingers will be sore when you first start playing, but that will go away after time and practice. So wrap around this hand and arch your fingers. You always want to have a gap between your palm here and the bottom of the neck. You do not want to rest your palm on the bottom of the neck. You should be able to fit a pencil between the palm of your hand and the neck.
Alternating Your Picking
Back to the right hand. We have our palm lightly on the bridge, and you are going to hold your pick with either your thumb and two fingers or your thumb and first finger. Either way is acceptable. With our right hand resting on the bridge, I want you to pick the sixth string, which will be the E string. Just pick one time down. We do something in guitar called alternating your picking, where you do down strokes and up strokes. Picking down towards the floor would be a down stroke, and picking up would be called an up stroke. So I want you to pick the sixth string, the E string, also referred to as the low E string. I want you to pick that string 4 times, alternating your picking up and down. Now I want you to go down to the fifth string, the A string, and I want you to pick that 4 times alternating your picking. Now to the 4th string, your D string, and pick that 4 times. Now to our third string, which is G, pick that 4 times. Remember to keep your palm rested on the bridge. Pick our second string, that’s B, pick that 4 times. Finally our 1st string, which is E, often referred as the High E string.
Before you move on, make sure that you have that alternating picking method down. It’s also really important to memorize the notes of the open strings. When I say open string, I mean the note you play without putting any fingers down with your left hand.
- Sixth String - E or Low E
- Fifth string - A
- Fourth string - D
- Third string - G
- Second string - B
- First string - E or High E
It is important to memorize those open string notes for now.
Exercise for Beginner Guitar Players
We are going to finish up the lesson by showing you a simple exercise incorporating our left and right hand. This simple exercise is to work on your muscle memory, finger dexterity, and coordination between your left and right hands. With your left hand, thumb on the back of the neck, arched fingers playing with your fingertips. I want your first finger, index finger, on the fifth fret. When you fret, you want to be right behind the actual fret, the silver piece. As close to it as you possibly can without being on top of it. That will give you the best tone and best sound. If you are too far back your guitar will often give a bad tone and buzzing sound. So you want to be right up against the fret to get a nice clear tone.
With your right hand technique, I want you to pick that string four times, alternating your picking. Now with your second finger I want you to go one fret up, on the sixth fret, while leaving your first finger down, and pick that four times. Now with your third finger, ring finger, go the next fret up, the 7th fret. Leave all your fingers down and pick that four times. Finally, place your pinky or fourth finger on the 8th fret. Make sure to leave all of your fingers down. Remember the whole time to be alternating your picking up and down.
Now we are going to go down to the A string and do the exact same thing. Starting with your index finger and moving down to the fourth finger. Then we are going to go down to the D string, and do the same thing. Again this is a great exercise to get your fingers moving and build up the coordination between your left and right hand. We are going to work all the way down the strings on your guitar. When you get to the last part, I want you to go backwards. All the way back up to where you started.
Go as slow as you need to go. It’s better to be slow and precise than fast and sloppy, you can always work your way up to faster. Once you get it down where you are playing each note twice, I want you to go through playing each note one time. You still have your palm on the bridge, and you are still alternating your picking. What you are working toward is something that sounds like this.
Once you get it down slow, you can work on your speed. I want you to practice this exercise all over the neck. You can start on the first fret, then go to the second fret, and so on. All the way down the neck. I want you to make sure that your notes are evenly spaced out. You want to avoid poor rhythm, and make sure your notes are all even. What you especially want to work on is going from one string to the next. When you go from your pinky on the E string back down to your first finger on the A string. You want to make sure you have smooth transitions going from each string.
Once you have this exercise down, you will be ready for how to play guitar lesson two. But I would strongly encourage you to not move on until you can play that smoothly without thinking about it too much.